Baby Boomer Nails: A Novel Nail Art Trend
Of all the nail art trends that come and go, some have a timeless appeal that never truly fades. Baby Boomer nails are a perfect example. Elegant, understated, and universally flattering, this technique is a staple for anyone who loves a classic, polished look. But what exactly are they, and why are they so enduring?
What Are Baby Boomer Nails?
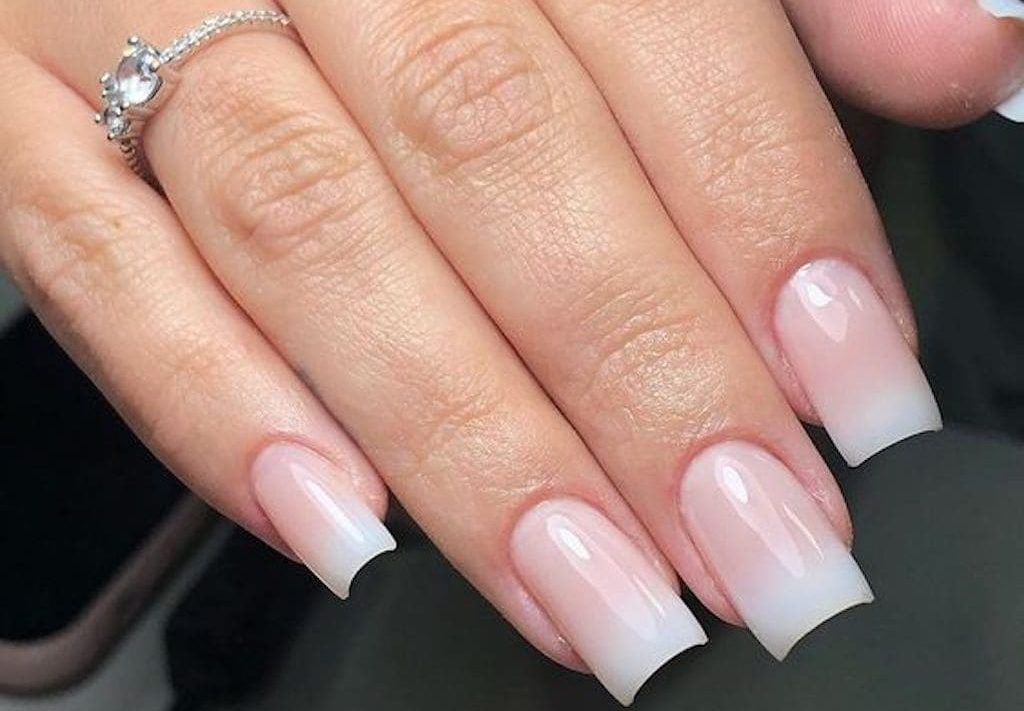
Often called an “ombre for grown-ups,” Baby Boomer nails feature a soft, seamless gradient from a sheer, natural pink at the cuticle to a clean, milky white at the free edge. Unlike a stark French manicure with its crisp white tip line, the Baby Boomer style is all about a subtle, blended transition. The result is a manicure that looks naturally healthy, elongated, and incredibly elegant. It’s the secret behind that “perfect, well-cared-for nails” look that seems so effortless.
The Origin Story
The name “Baby Boomer nails” is believed to have originated in the 1980s, though the technique itself was popularized further in the 1990s, particularly in South Korea. It was designed to appeal to a generation—the Baby Boomers—who wanted a manicure that was sophisticated and age-appropriate. The goal was to enhance the natural beauty of the nail without loud colors or dramatic art, creating a look that was both professional and chic. Over time, its appeal has broadened, becoming a favorite for women of all ages who appreciate its subtle glamour.
How to Get the Perfect Baby Boomer Manicure?
Achieving the signature blended look can be done at a salon or with a bit of practice at home. Take out your manicure kit, here’s a simple step-by-step guide:
1. Prep and Prime: Start with clean, shaped nails. Push back your cuticles and apply a base coat to protect your natural nail and create a smooth canvas.
2. The Base Color: Apply a thin, even layer of a sheer, soft pink or nude polish over the entire nail. This will be your base and the color that is strongest at your cuticle. Let it dry completely.
3. Create the Gradient: This is the key step! You’ll need a makeup sponge.
- Paint two parallel stripes on the sponge: one with your sheer pink polish and one with a milky white polish, ensuring they touch.
- Gently dab the sponge onto your nail, focusing the white polish towards the tip and the pink towards the cuticle. You may need to dab it 2-3 times to build up the color.
- The sponge will create a soft, diffused line where the two colors meet.
4. Seal and Shine: Once you’re happy with the gradient and it’s dry, carefully clean up any polish around your skin with a small brush dipped in nail polish remover. Finish with a high-shine top coat to seal the design, blend the layers perfectly, and add durability.
Creative Inspiration: Beyond the Classic
While the classic pink-and-white combo is iconic, the Baby Boomer technique is a fantastic base for creativity. Here are some ways to personalize it:
- Modern Neutrals: Swap the classic pink for a sheer beige, soft grey, or even a barely-there lavender. The effect is equally chic and modern.
- Sparkle and Shine: Add a touch of glamour by applying a fine glitter top coat only on the white tip area, creating a “glazed donut” effect.
- The Reverse French: For a trendy twist, try a reverse Baby Boomer, where the white is at the cuticle and blends into a sheer color towards the tip.
- Accent Nails: Keep four nails in the classic style and use your ring finger as an accent nail. You can adorn it with a single rhinestone, a delicate line of gold foil, or a minimalist line art design.
In a world of bold nail art, Baby Boomer nails remain a sanctuary of subtlety. They are proof that the most powerful statements are often the quietest. Whether you’re heading to the office, a wedding, or just want to treat yourself, this manicure is a timeless choice that always looks impeccable. So, why not give this classic trend a try? Your effortlessly elegant new look is waiting.
Read also: What products does a podiatrist use for foot care?