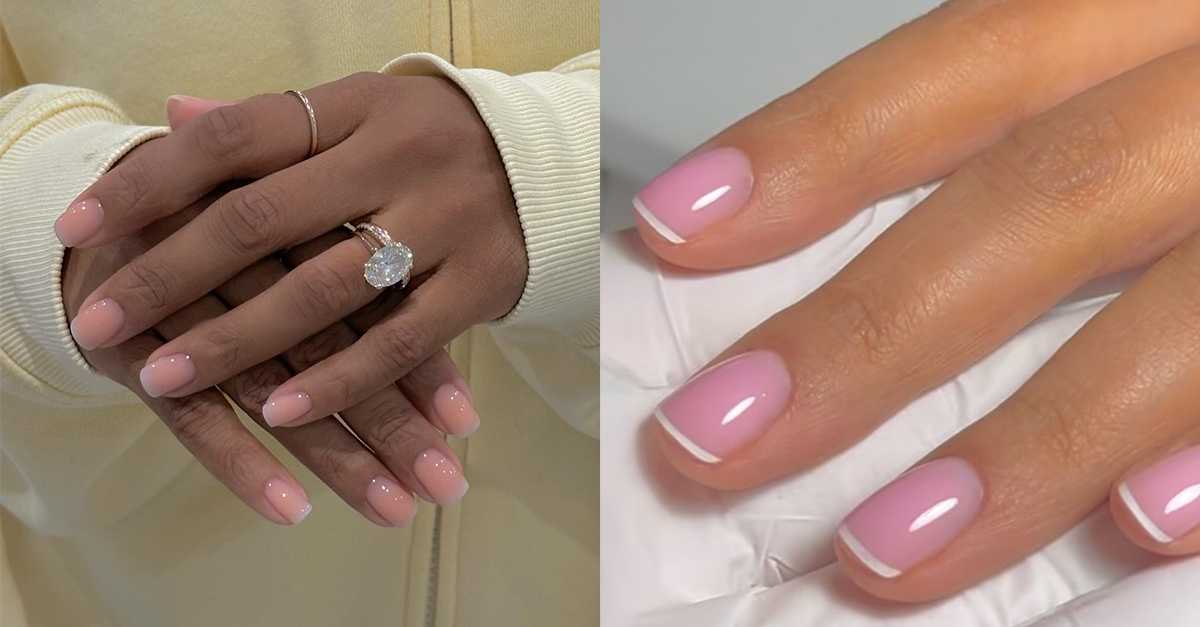
Mastering Nail Drill Bits for Short French Manicures
Short French manicures are delicate. The nails are shorter, the surface area is smaller, and every error stands out. When working in such limited space, precision isn’t just a goal—it’s a necessity. And that precision starts with your nail drill bits.
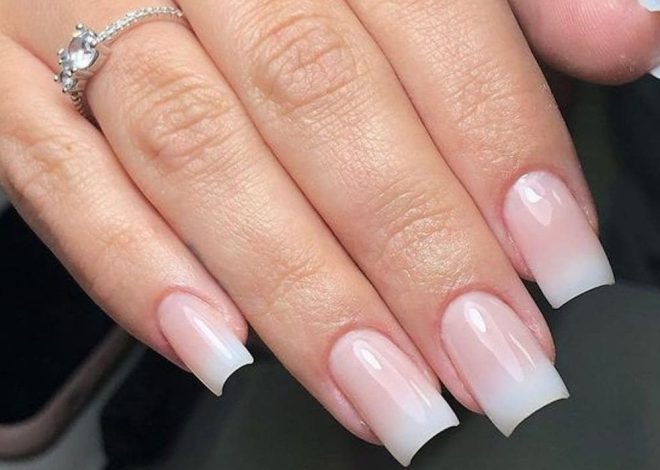
Here’s how to choose and use the right bits for flawless short French nails.
The Challenge of Short French Manicures
Short nails leave little margin for error. The white tip must be perfectly proportioned—too thick and it overwhelms the nail; too thin and it looks uneven. The cuticle area needs clean, seamless preparation to create a natural transition between the natural nail and any enhancement.
Traditional filing methods often fall short. Coarse grits remove too much material too quickly. Large bits can’t navigate tight corners. The result? Uneven surfaces, visible transitions, and premature lifting.
The solution lies in choosing bits designed for precision work on limited surface area.
Choose the Right Bit Material
Diamond Bits are your primary tool for cuticle work and natural nail prep. Made with industrial diamond particles, they gently abrade rather than aggressively cut. This makes them safe for the natural nail plate and ideal for delicate work around the cuticle area. Fine-grit diamond bits remove shine from the nail plate before enhancement application without over-thinning.
Ceramic Bits generate less heat than metal carbide bits, making them excellent for sensitive clients and for removing gel polish on short nails. Their smooth cutting action and controlled aggression keep the nail plate safe.
Carbide Bits should be used with extreme caution on short nails. These bits have cutting flutes that shave through product aggressively. On a short nail, the margin between product and natural nail is minimal. Save carbide bits for bulk removal on longer extensions and never use them directly on the natural nail plate.
Select the Perfect Bit Shapes
Flame Bit resembles a candle flame—wider in the middle with a tapered point. This shape is designed to work inside the cuticle pocket, lifting dead skin from the nail plate and cleaning the sinus areas. The tapered tip allows you to work close to the cuticle fold without aggressive contact. For short French nails, this precision is critical for creating that seamless cuticle line that makes the entire manicure look natural.
Small Cone Bit features a tapered shape that provides excellent visibility and control over the entire nail surface, giving you easy access to sidewalls, the cuticle area, and underneath the free edge. Its fine grit ensures gentle work around delicate areas.
Ball Bit works like an eraser. After the flame bit lifts the cuticle, the ball bit gently buffs away dry, dead skin around the nail folds. The spherical shape follows natural contours without digging in.
Inverted Cone Bit features a wider tip with sides that angle inward. This shape is designed for carving smile lines during French fills with exceptional accuracy. For short nails where the smile line must be perfectly proportioned, this bit is invaluable.
Safety Bit has a rounded top with no sharp edges, allowing you to work very close to the cuticle without cutting the client. This is essential when working on short nails where the distance from cuticle to free edge is minimal.
Techniques for Precision
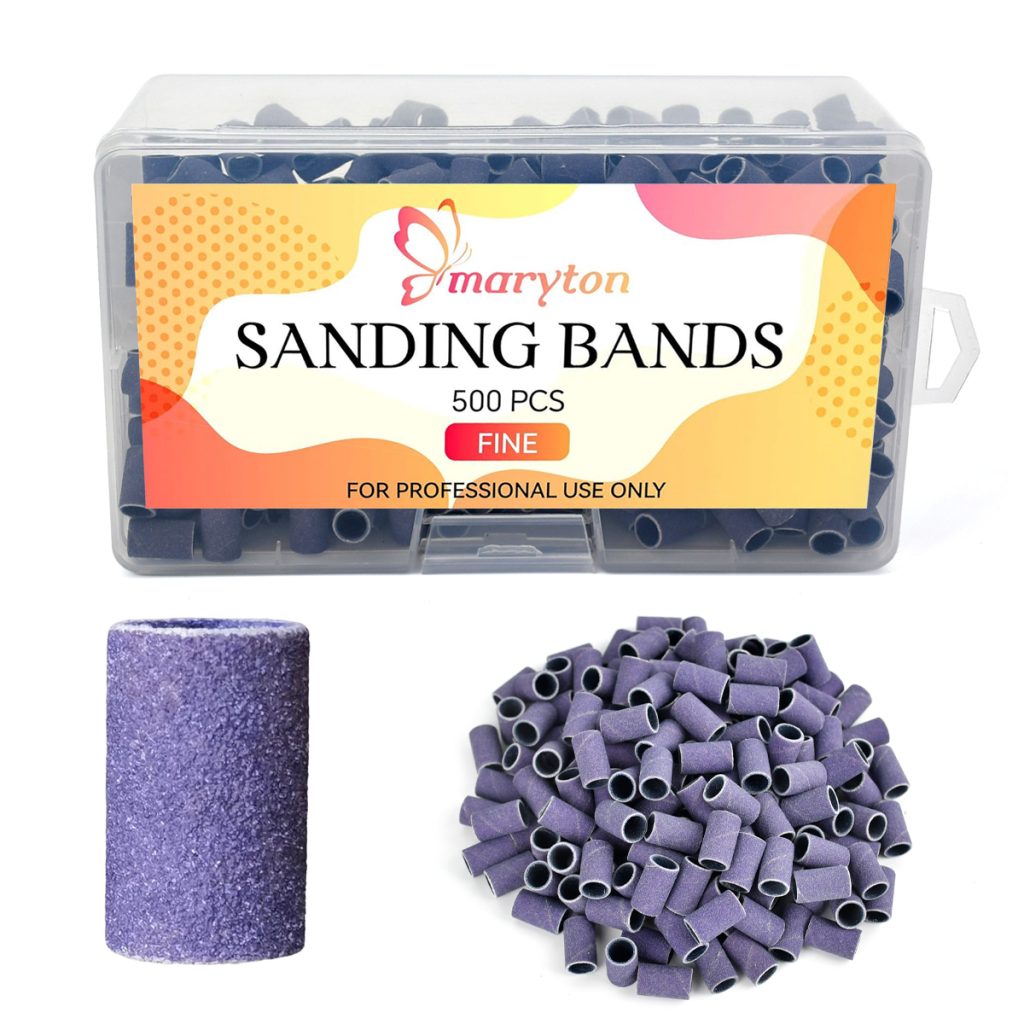
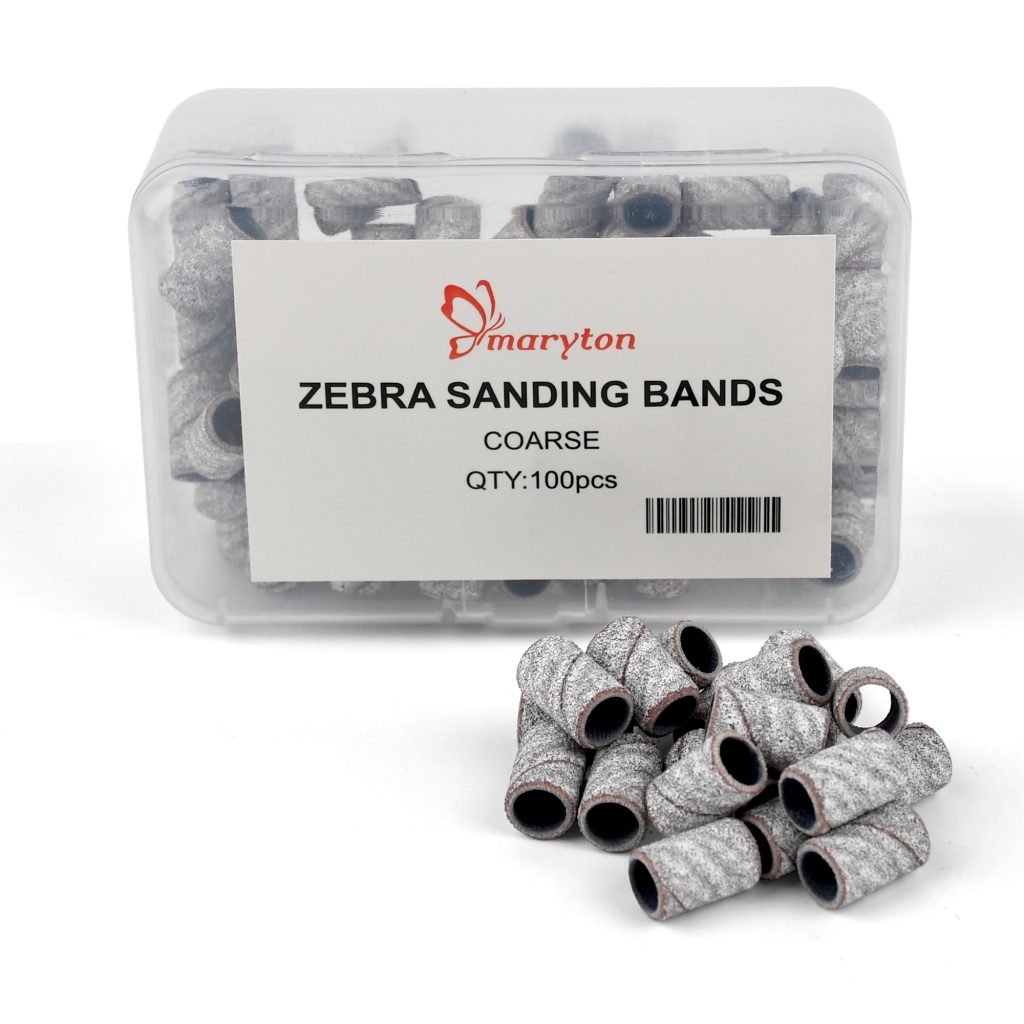
Always use fine or extra-fine grit. For short French nails, fine (red band) and extra-fine (yellow band) grits are your standard. Fine grit removes shine and cleans cuticles without over-thinning. Coarse or medium grits remove too much material too quickly and can weaken the nail plate.
Keep speed low and pressure light. For cuticle work and natural nail prep, set your RPM between 5,000 and 8,000. Higher speeds reduce control and increase heat. Let the bit do the work—light, steady pressure prevents overheating.
Keep the bit moving. Never hold the bit in one spot for more than a second. Constant movement prevents friction buildup, which can cause burns, heat spikes, and permanent nail damage.
Hold the bit at the correct angle. The bit should make contact with its “belly” or side, not its tip. The plane of the bit and the nail should be in contact. Working at too steep an angle can dig into the nail plate, creating grooves and thinning the natural nail.
Work systematically. Use the flame bit to prepare the cuticle area, lifting dead skin and cleaning the nail plate. Switch to the ball bit to buff away dry tissue around the nail folds. Use the small cone bit to clean sidewalls and underneath the free edge. Carve the smile line with the inverted cone bit. Finish with light surface prep using a fine diamond barrel bit or sanding band.
Safety and Maintenance
Clean your bits after each use with a wire brush to remove debris from the grits or flute cuts. Disinfect metal bits properly between clients. Store them in a clean, dry case.
Short French manicures demand patience and precision. With the right bits and careful technique, you can achieve a seamless, salon-quality finish on even the smallest nails.
Read also: Understanding and Tackling Foot Corns: A Simple Guide
Related Posts
Understanding and Tackling Foot Corns: A Simple Guide
Baby Boomer Nails: A Novel Nail Art Trend
